
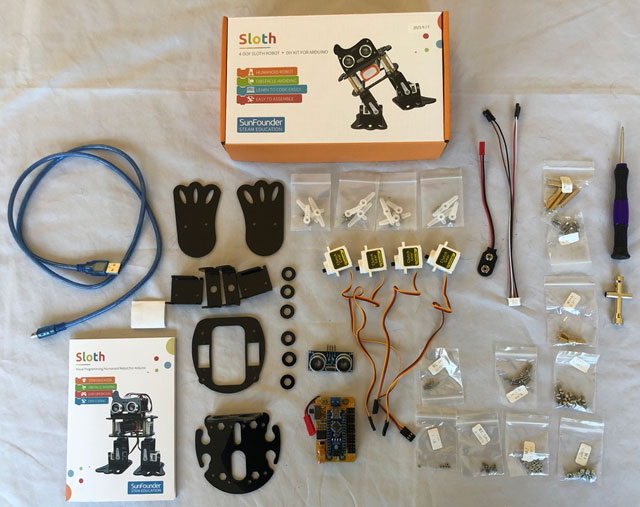
The above picture shows all of the parts and the documentation booklet that is included in the box. The small manual is attractive and laid out well, but the written English is a little stilted here and there, but not enough to confuse the directions.
Pages 1 thru 3 contain an inventory of all of the parts that are part of the robot plus the two (2) tools used in the assembly (screw driver and multi-purchase socket wrench). The kit contains a mini-USB cable to connect the robot to a computer for programming purposes (blue cable on the left in the above picture). As indicated in the previous section, the required 9 volt battery is not included.
Though the parts list includes the number of each type of screw, nut, …, these are the number that are required in the fully assembled kit. There are number of extra screw and nuts since it is quite easy to lose them in the assmbly process given their small size.
The acrylic parts are not marked or labeled. This is not an issue with the exception of the FEET. It is very easy to confuse which is the right and left foot, which we did when initially assembling the kit. The assembly video was also NO HELP in noting the importance of identifying which is the left and right foot.
While all of the screw, number and standoff parts bags are individually marked, the labels were impossible to read since the printer used was running of ink. So if this is your first kit, pay attention to the size of the screw/nut before you use them to assemble the next part.